How-to
Dec 11, 2025
OpenConsole Setup & Troubleshooting Guide


This guide will walk through the setup process, controller pairing, classic game file setup, and common troubleshooting tips for your OpenConsole device.
What's in the Box
Welcome to OpenConsole – a compact Android-based game system that lets you play retro games, explore web-based titles, and load your own ROMs.
What’s in the Box
Each OpenConsole package includes:
OpenConsole HDMI game stick
1x wireless controller
USB power cable
HDMI extension cable
Quick Start guide
Prefer to follow along visually? Watch this quick start video for a step-by-step walkthrough on setting up your OpenConsole, connecting your controller, and getting started with games.
Getting Started
Step 1: Connect to Your TV and Power Source
Plug the OpenConsole device into an HDMI port on your TV or monitor.
If space is limited, use the included HDMI extension cable.
Connect the device to a wall outlet using the USB power cable and included adapter.
Important: Do not power the device through your TV’s USB port. Use a power outlet for reliable performance.Switch your TV input to the correct HDMI source. The device should boot up automatically. First boot may take several minutes.
Step 2: Power On and Pair Your Controller
The included controller comes already paired with your OpenConsole and should be ready to use out of the box.
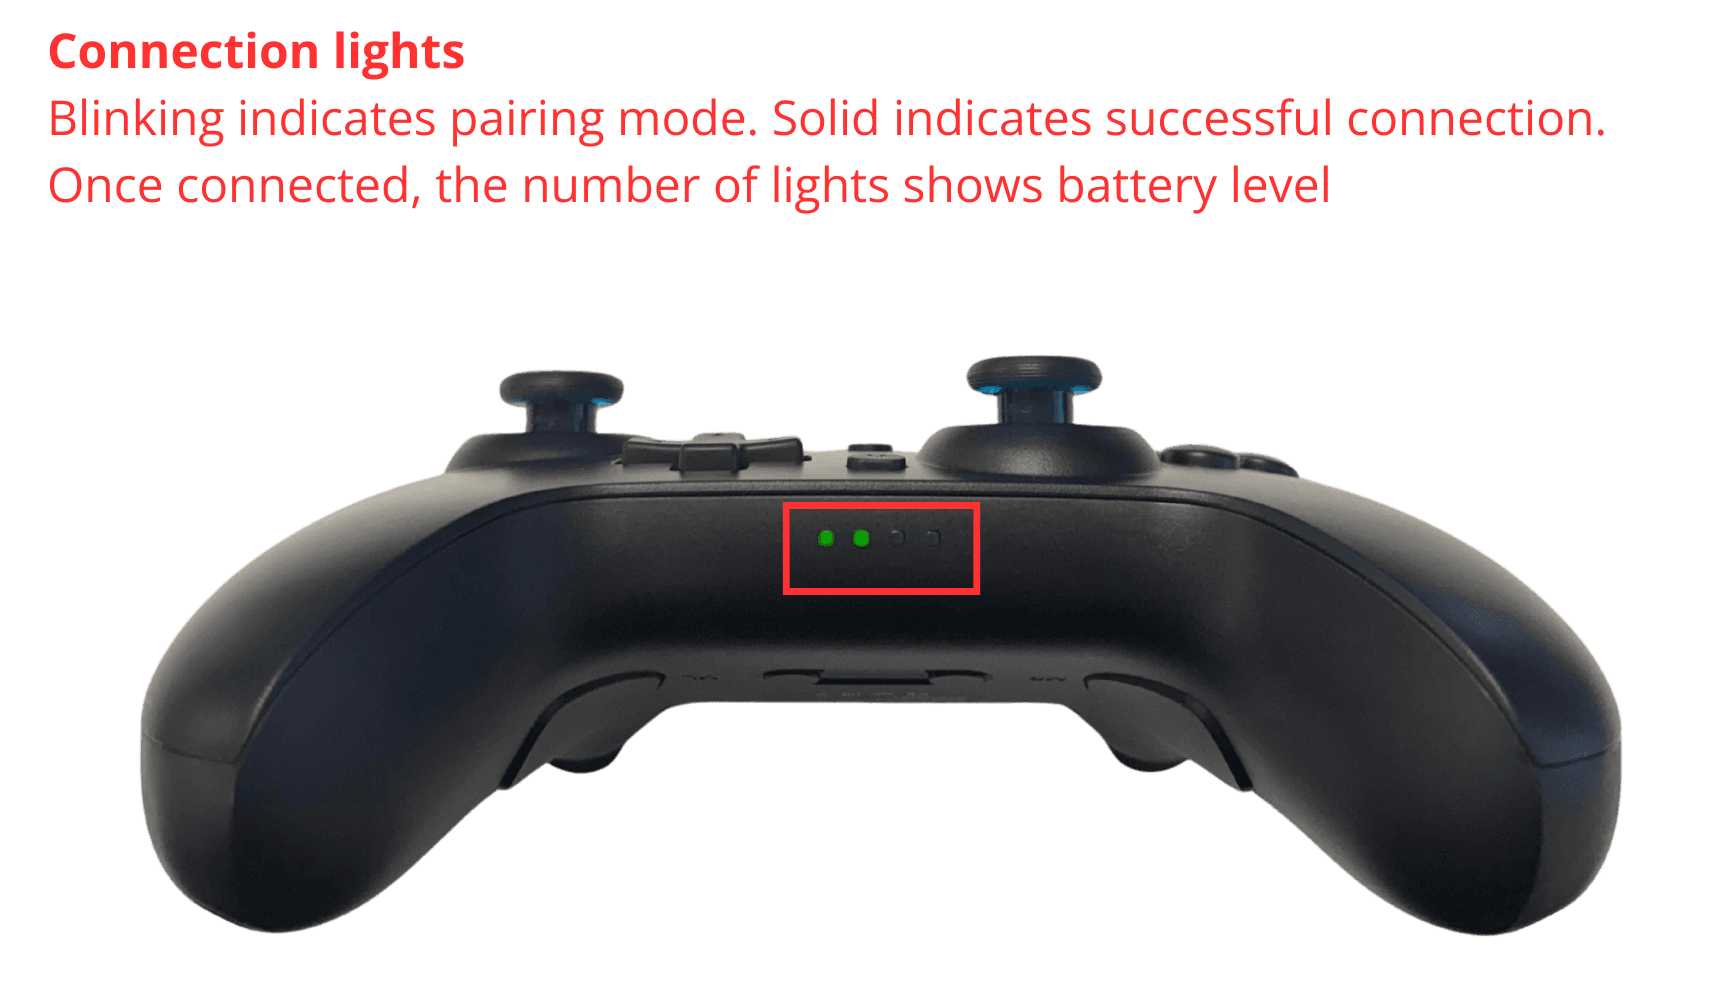
To turn on the controller: Press the Home button once (do not hold). The LED light will blink, then turn solid to indicate a successful connection.
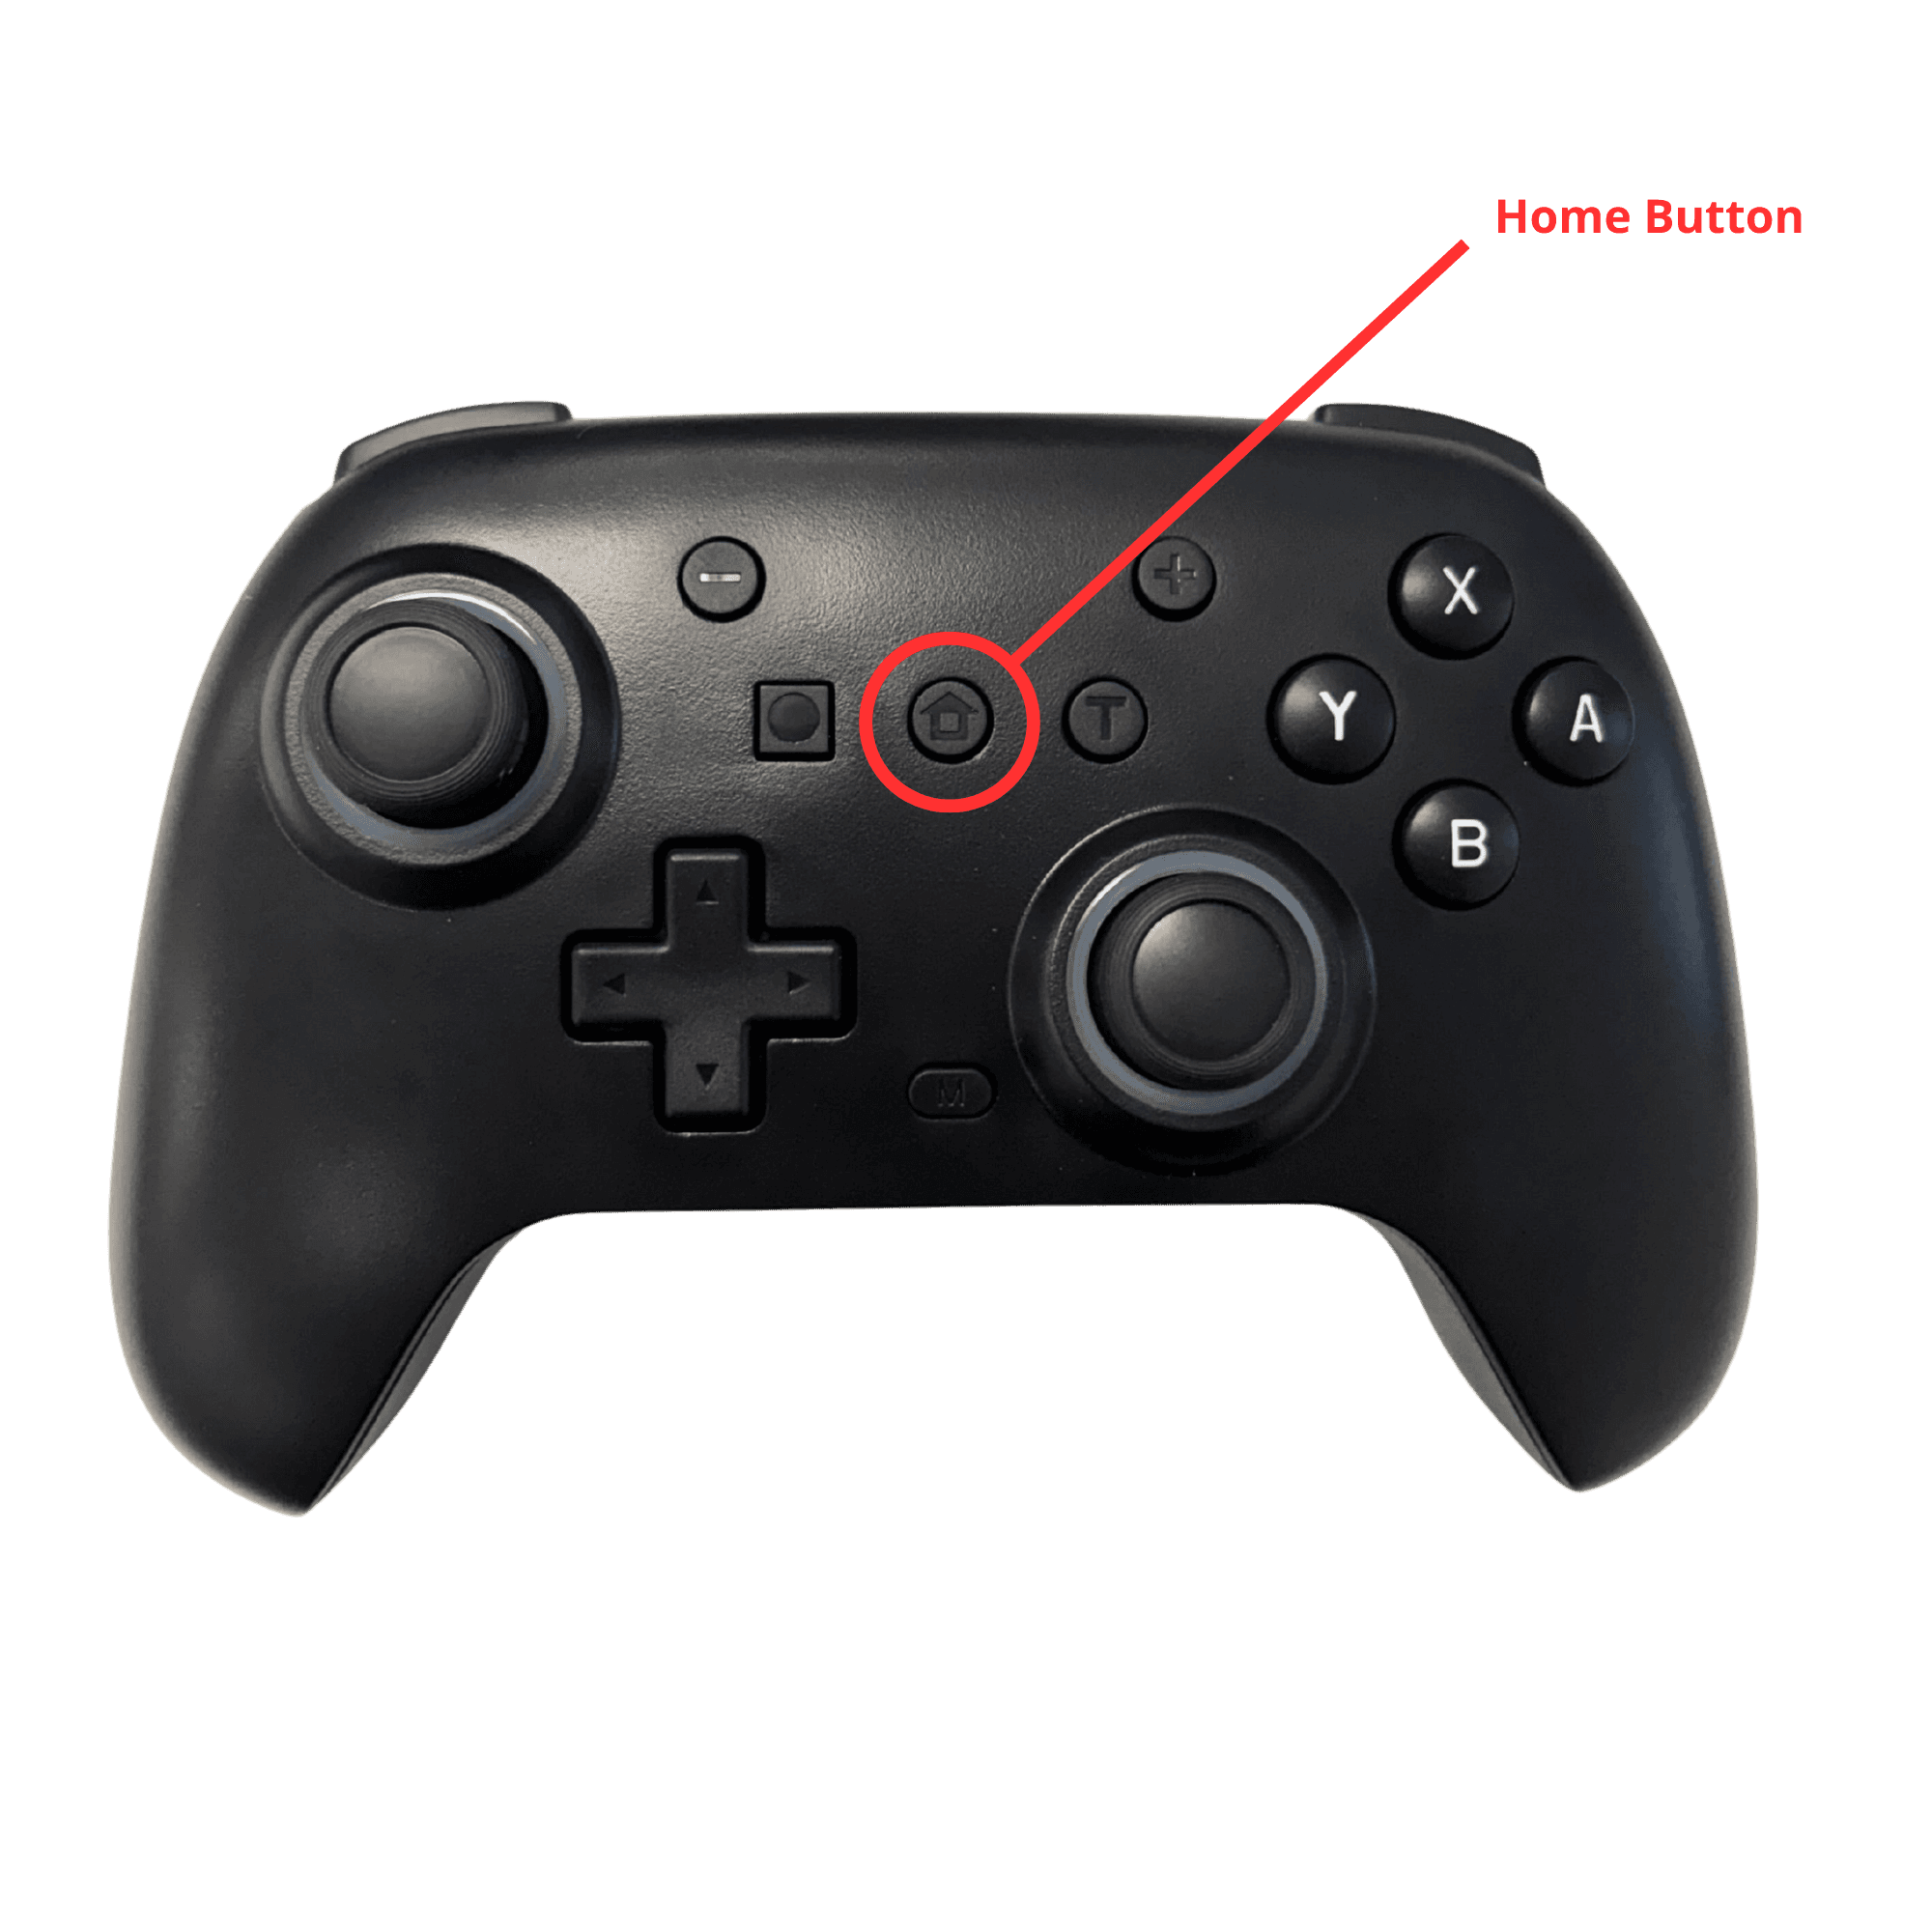
If the controller doesn’t connect:
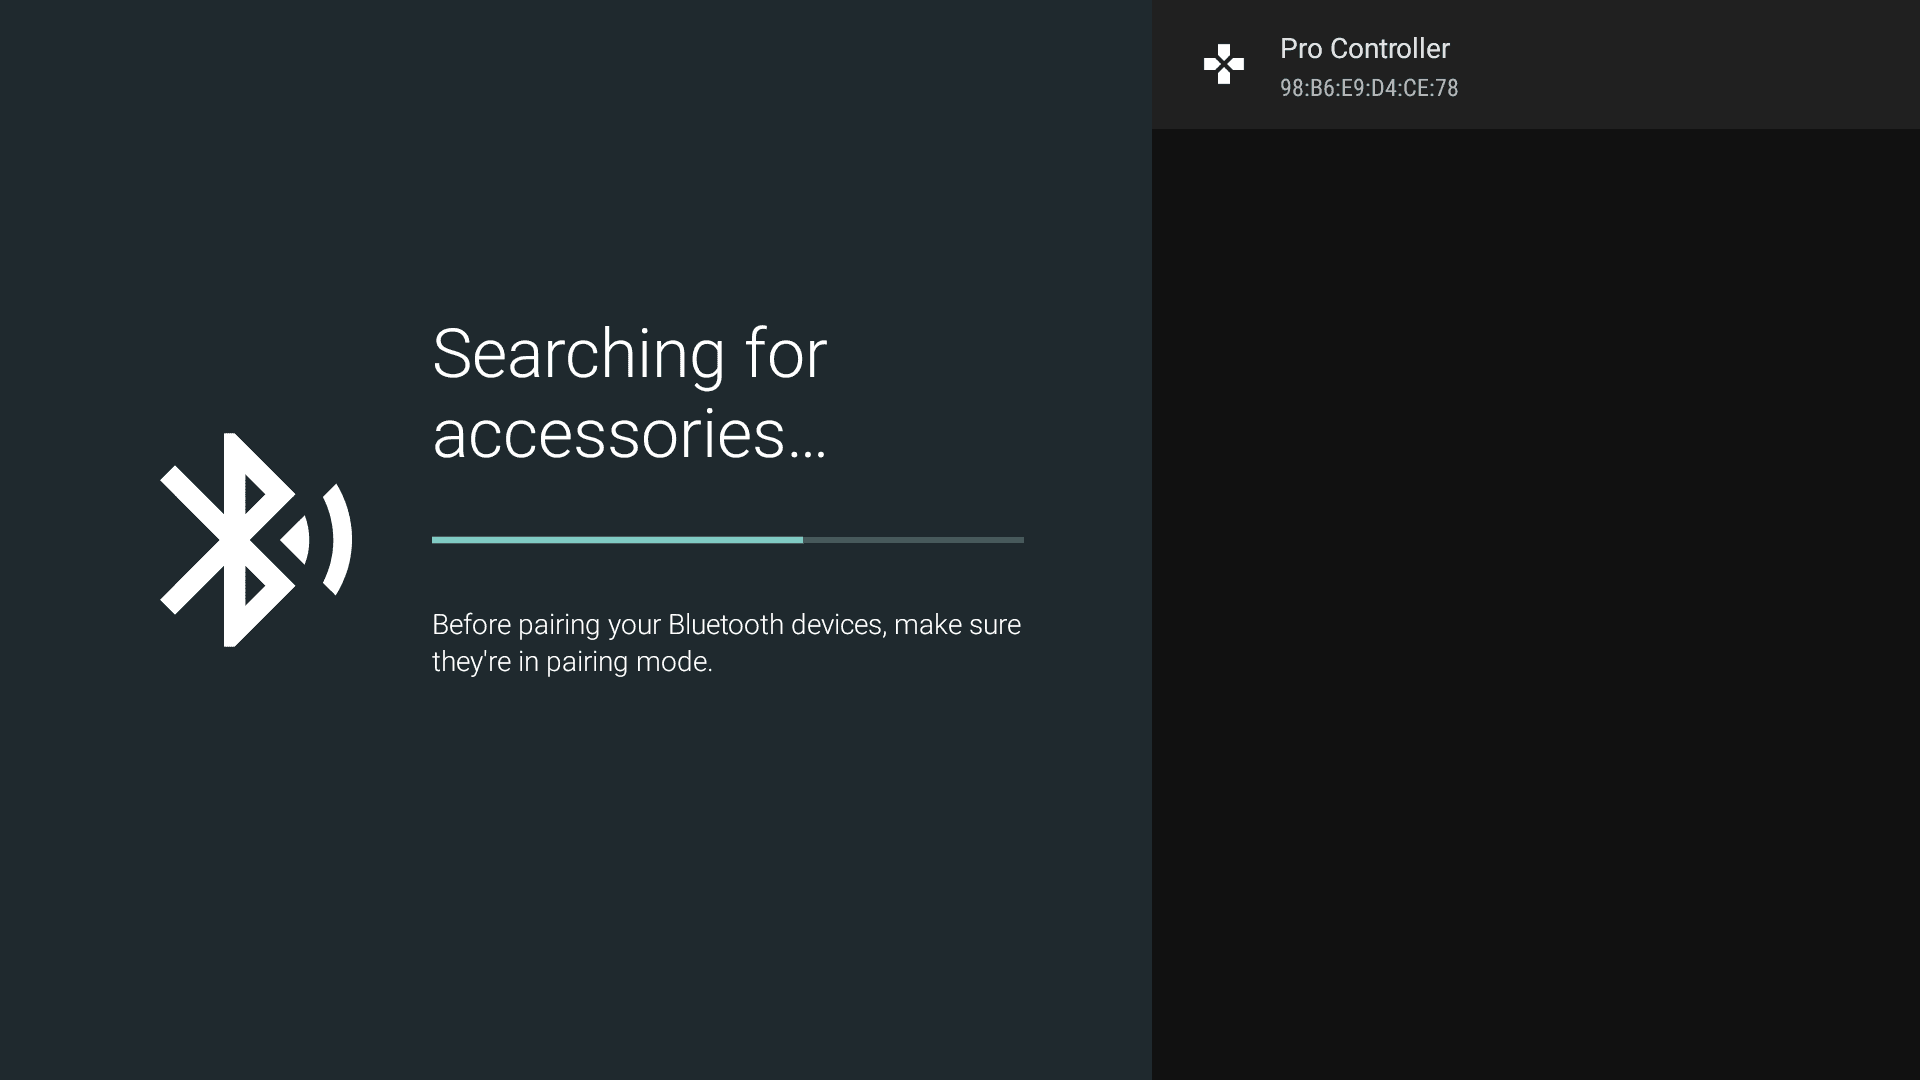
Go to Settings > Remotes & Accessories > Add Accessory on OpenConsole.


Put the controller into pairing mode by holding the Pair button on the back until the LED starts flashing rapidly.

Select the controller when it appears in the list, and confirm pairing.
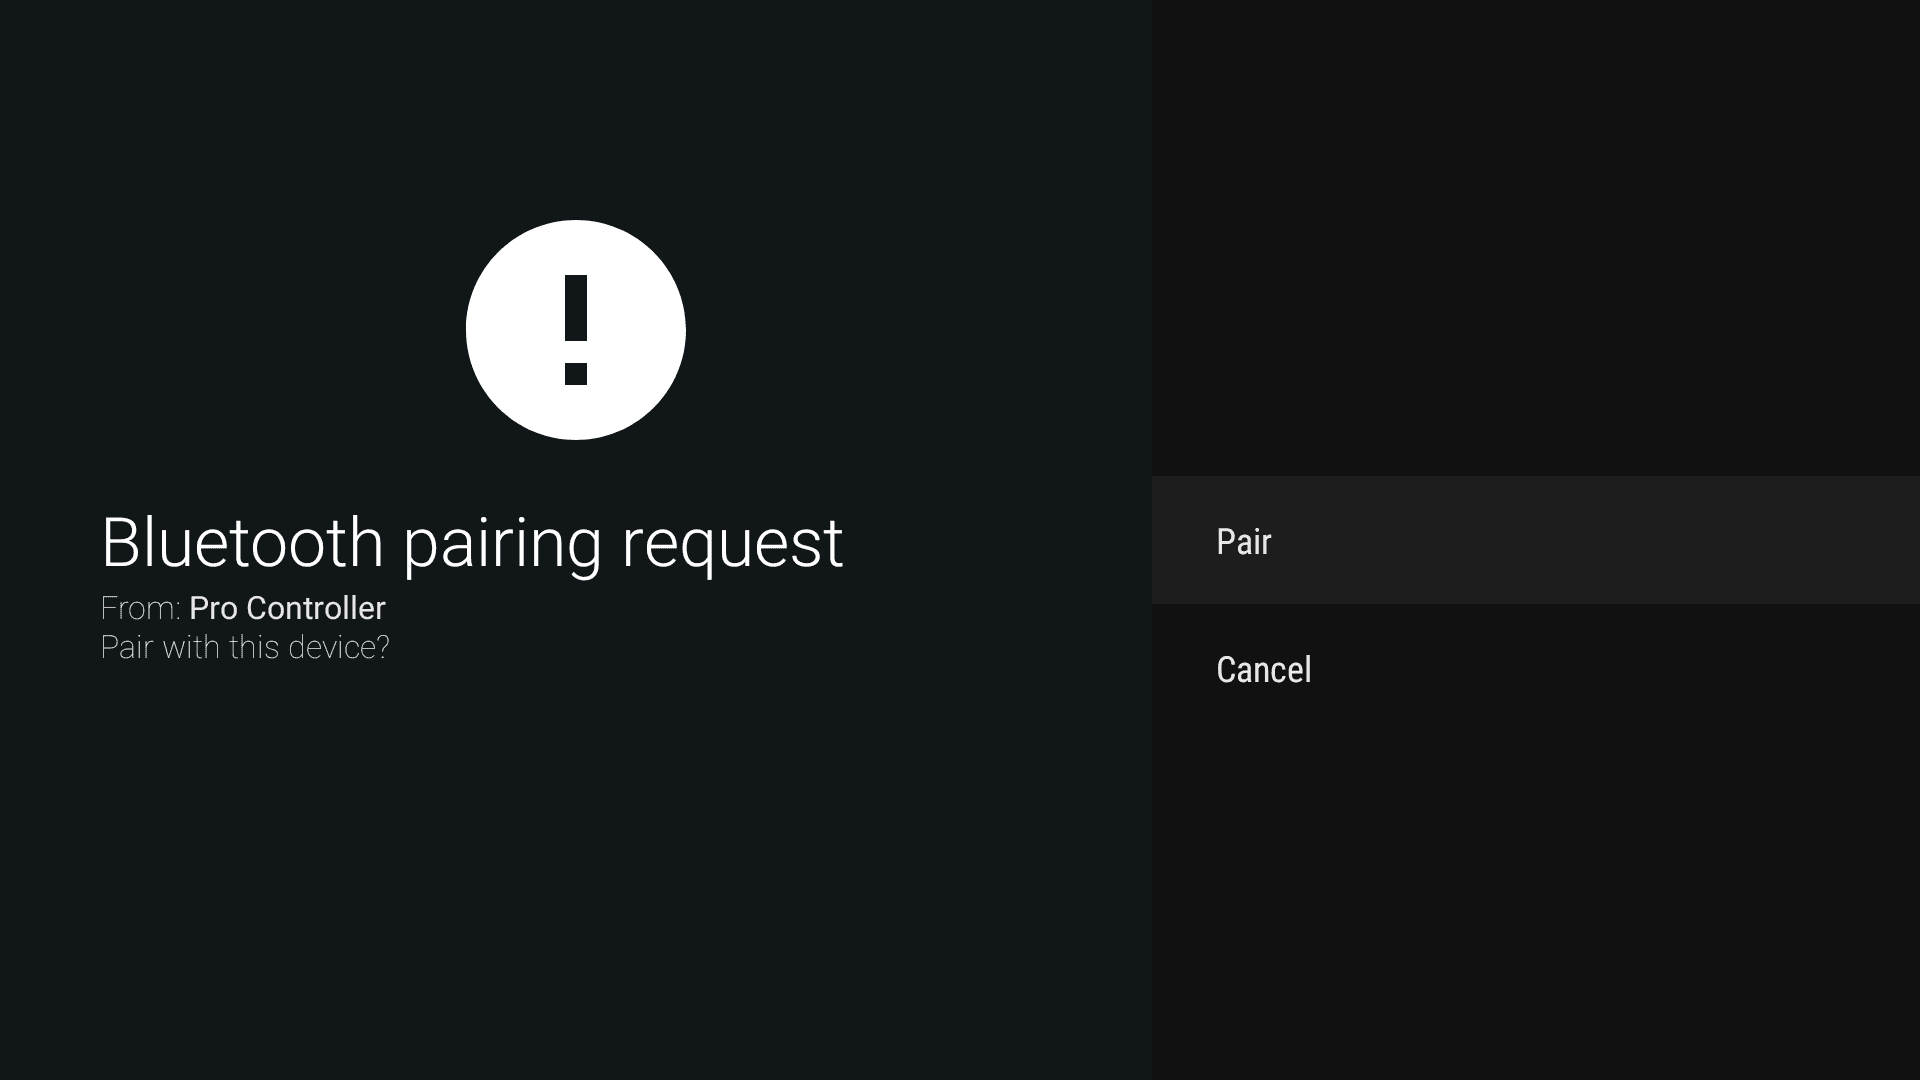

Once connected, the LED light will remain solid.
Step 3: Connect to the Internet
Your OpenConsole requires internet access to play web games and access certain features.
On the home screen, use the controller to navigate to Settings > Network & Internet.

Select your WiFi network and enter your password.
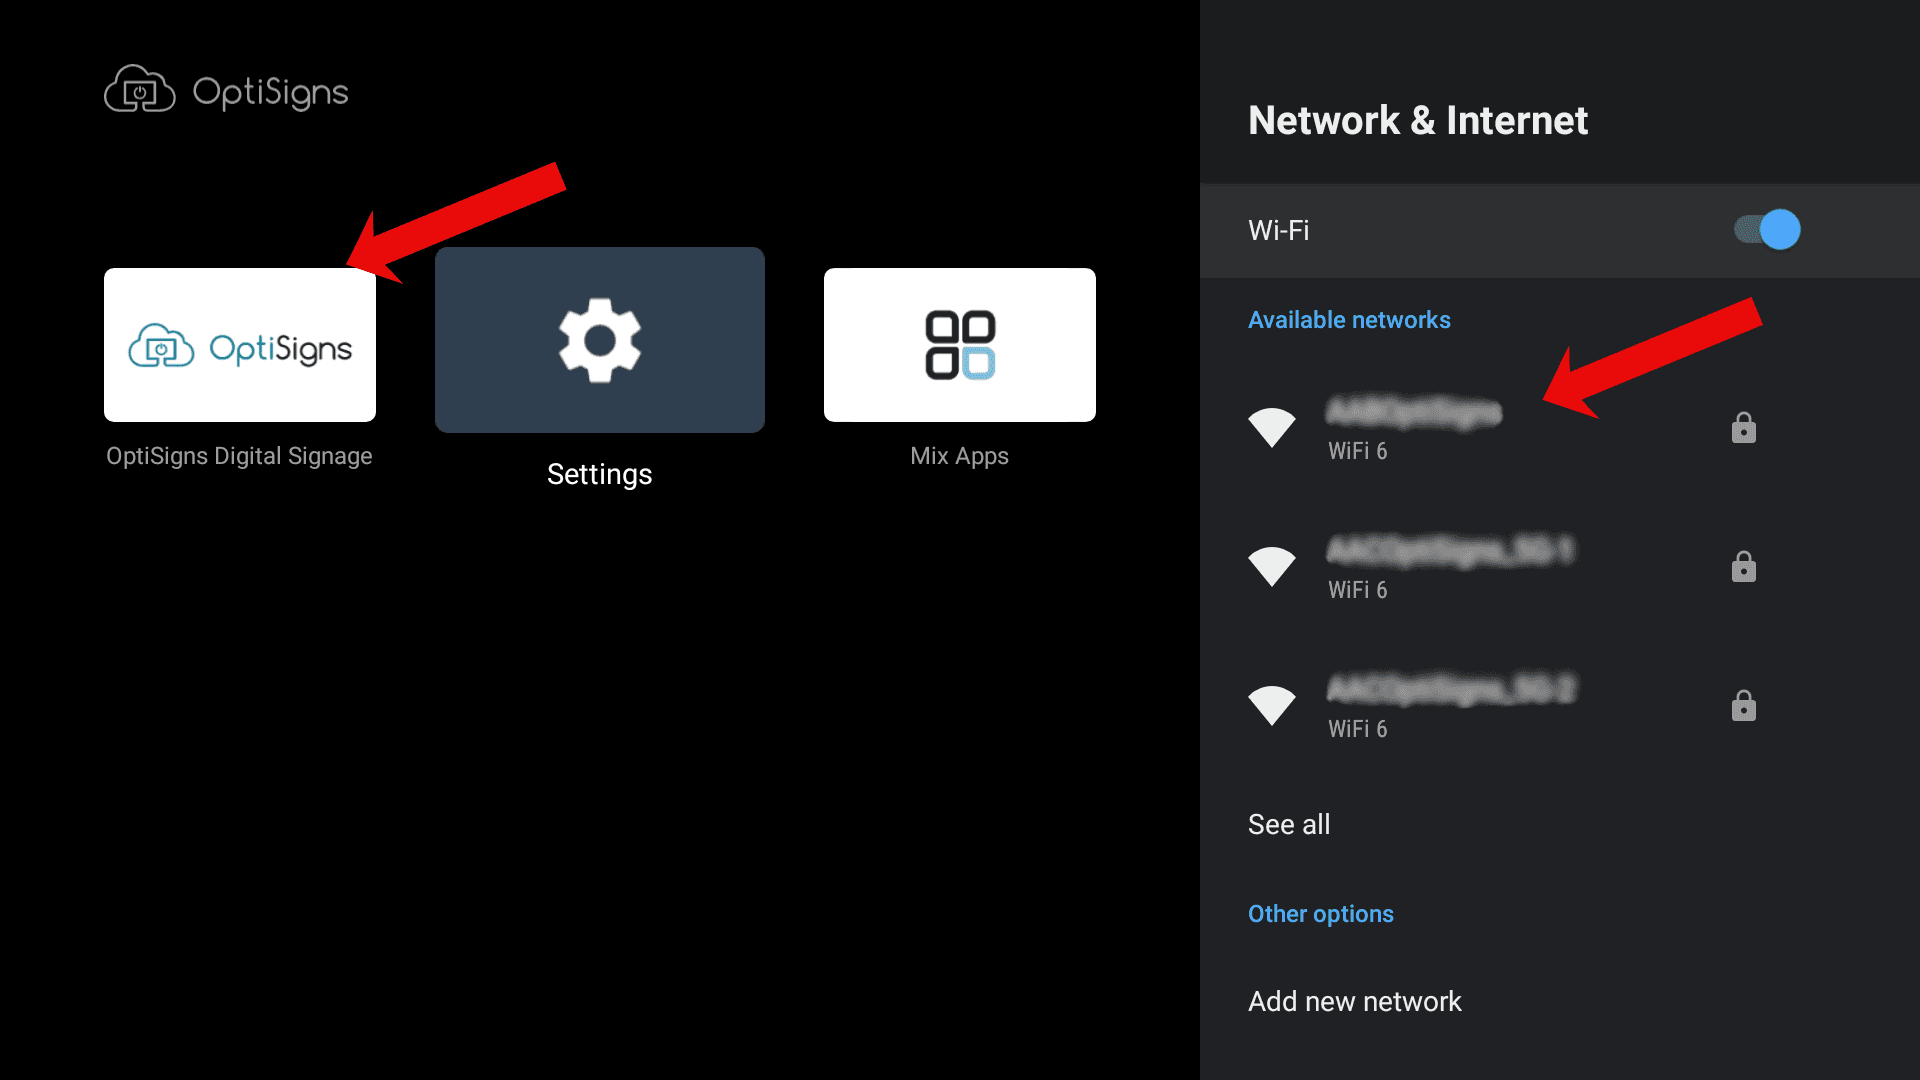
Once connected, return to the home screen.
The main game launcher app is located to the left of the Settings icon.
Playing Games
Instant Play: Web Games
A selection of web games is available directly from the OpenConsole home screen.
Use the D-pad or left stick to browse games under the “Featured Web Games” section.
Press the B button to select and launch a game.
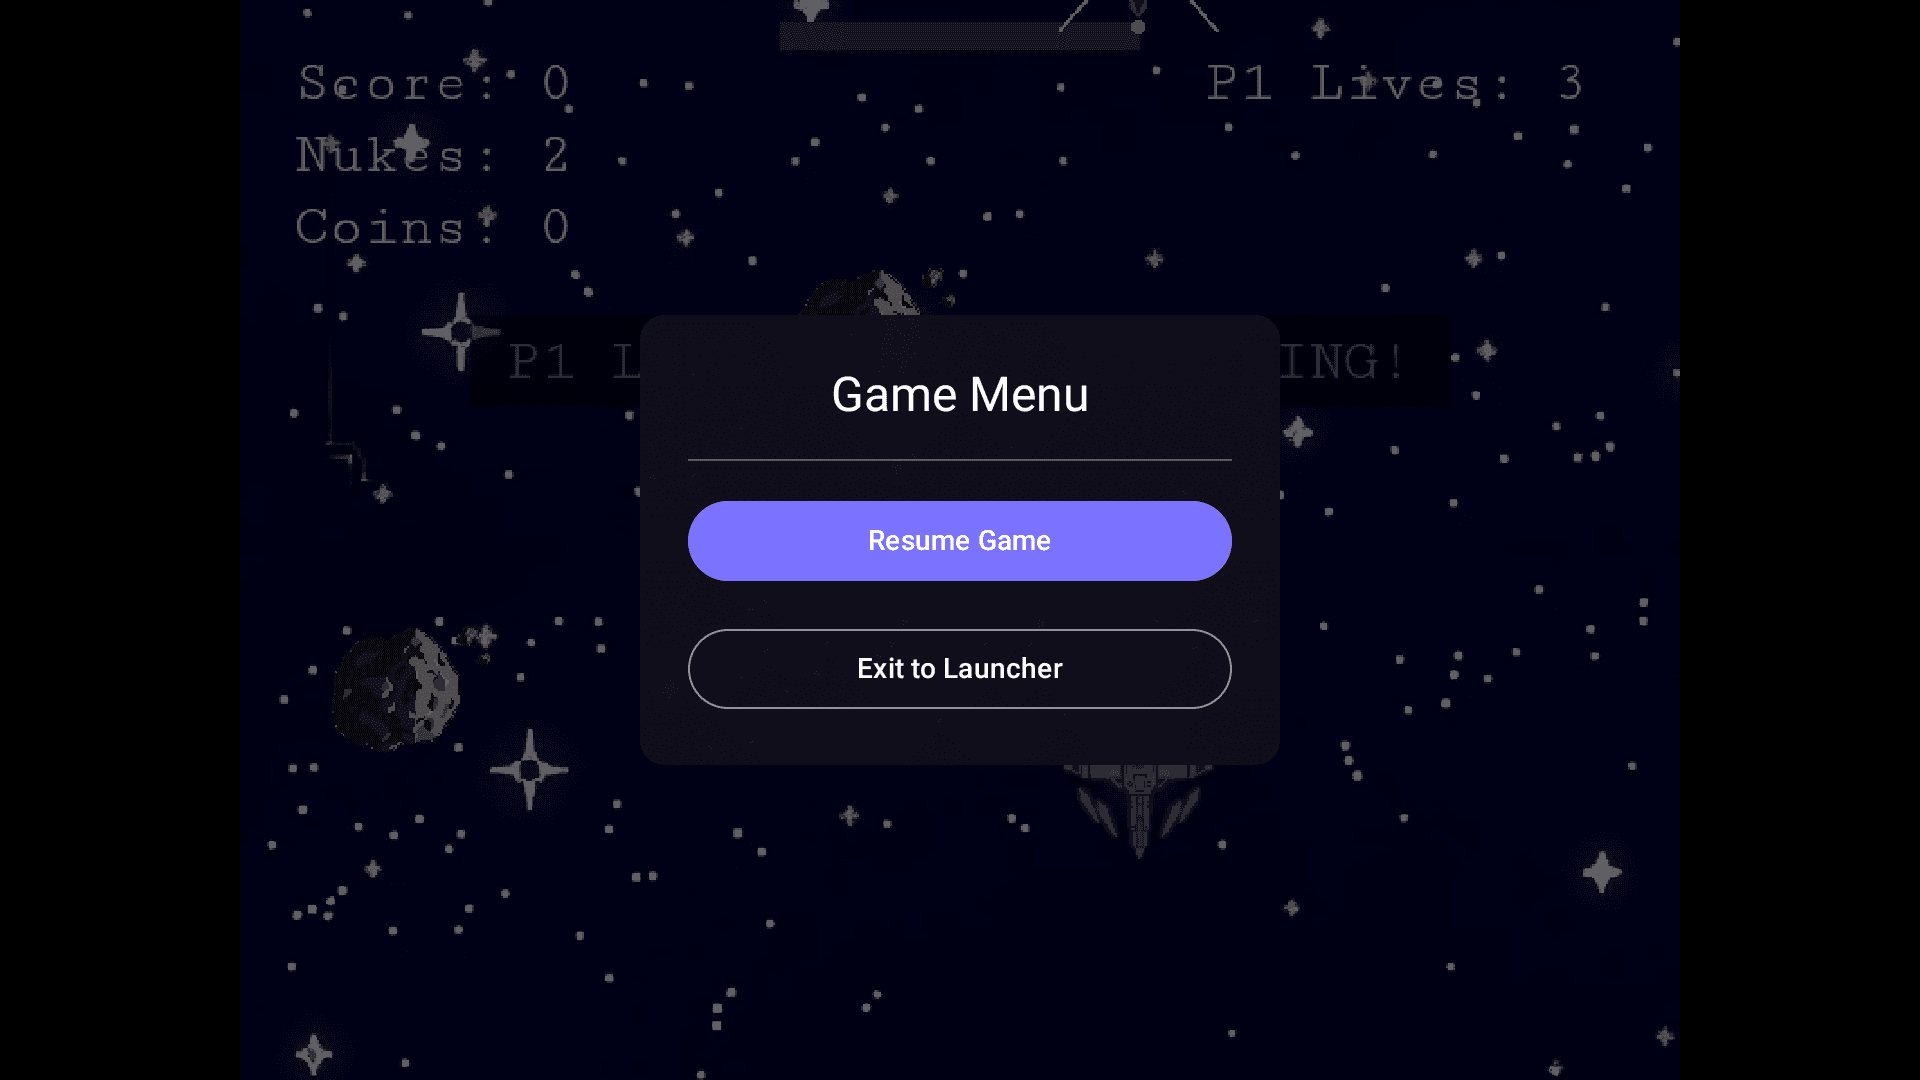
During gameplay, press the + and – buttons together to open the game menu or exit.
If a game fails to start, verify your network status under Settings > Network & Internet.
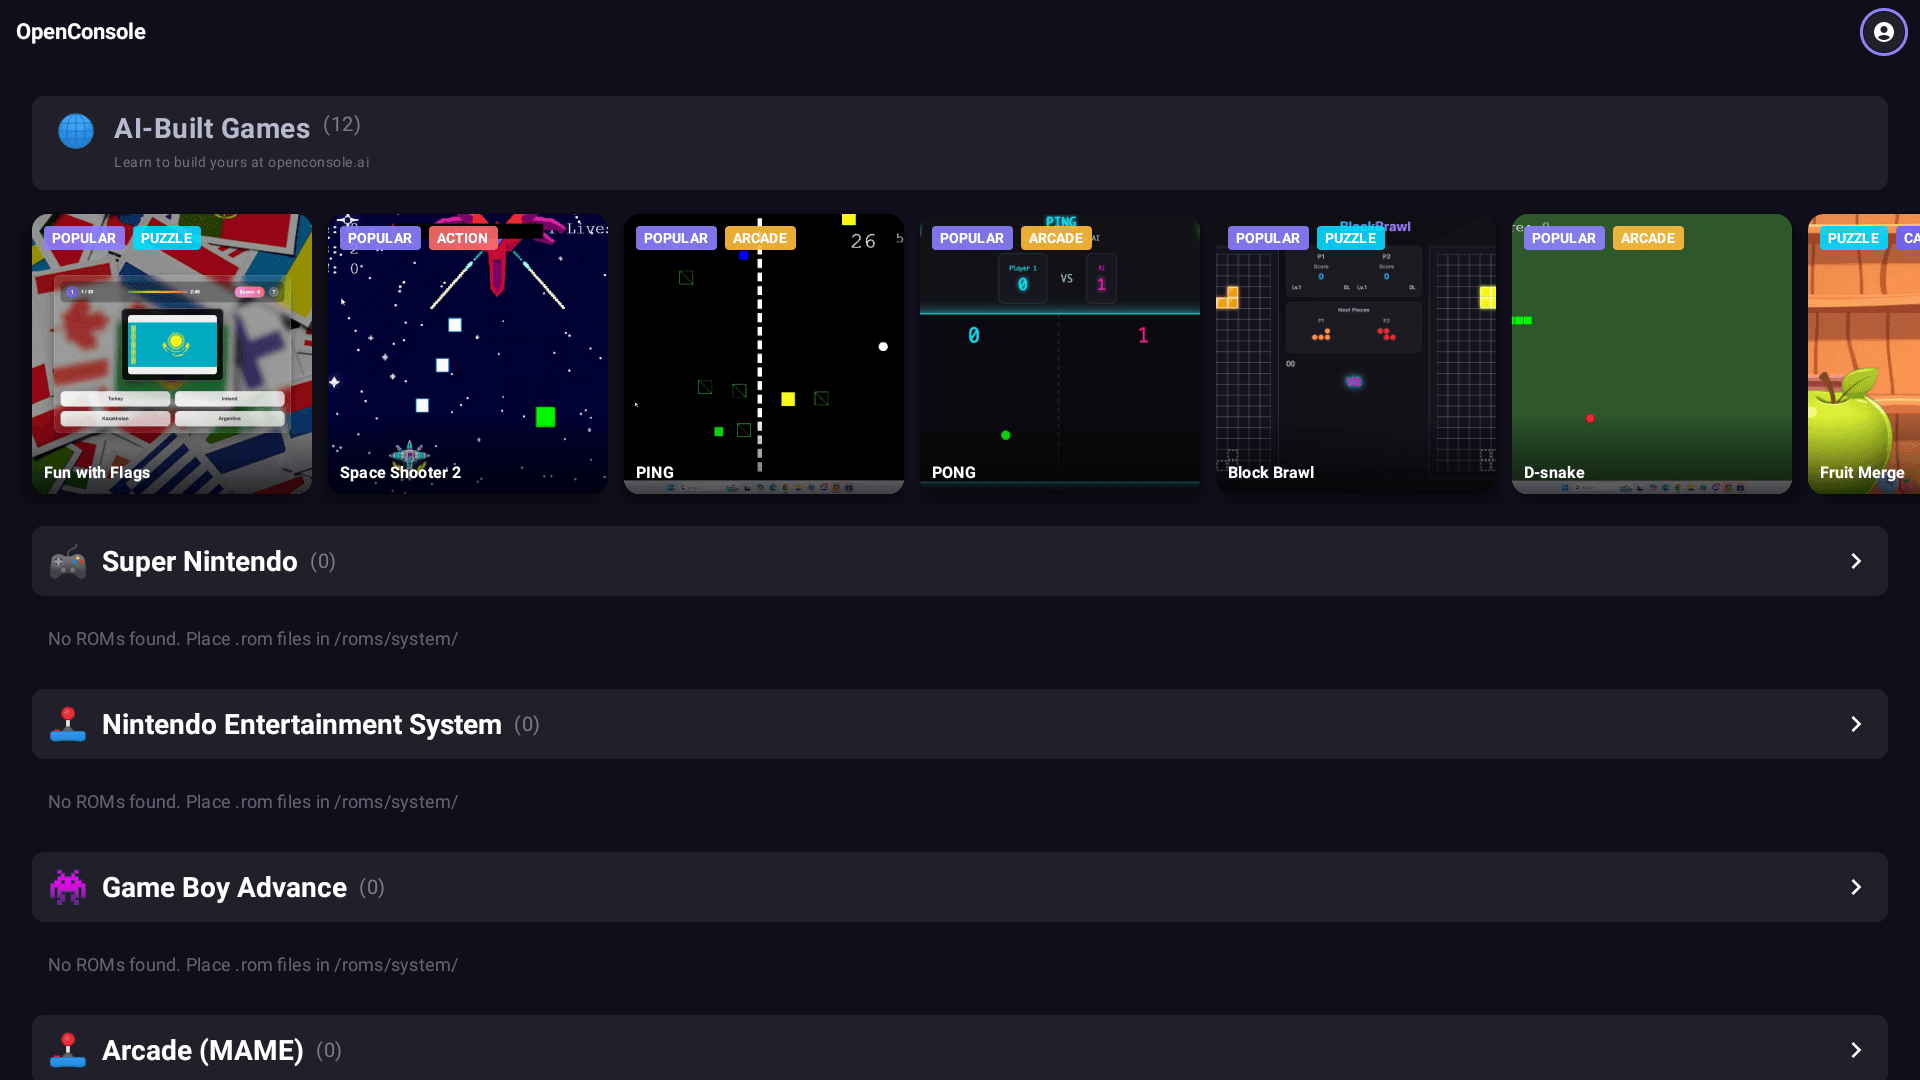
Classic Console Games (NES, SNES, GBA)
OpenConsole supports emulator-compatible ROMs for NES, SNES, and GBA games. You must provide your own legally obtained ROM files.
How to Load ROMs:
On your computer, place your ROM files into the following folder structure on a USB flash drive or SD card:
/roms/nes/ → for .nes files
/roms/snes/ → for .sfc or .smc files
/roms/gba/ → for .gba files
Plug the USB drive into the OpenConsole device.
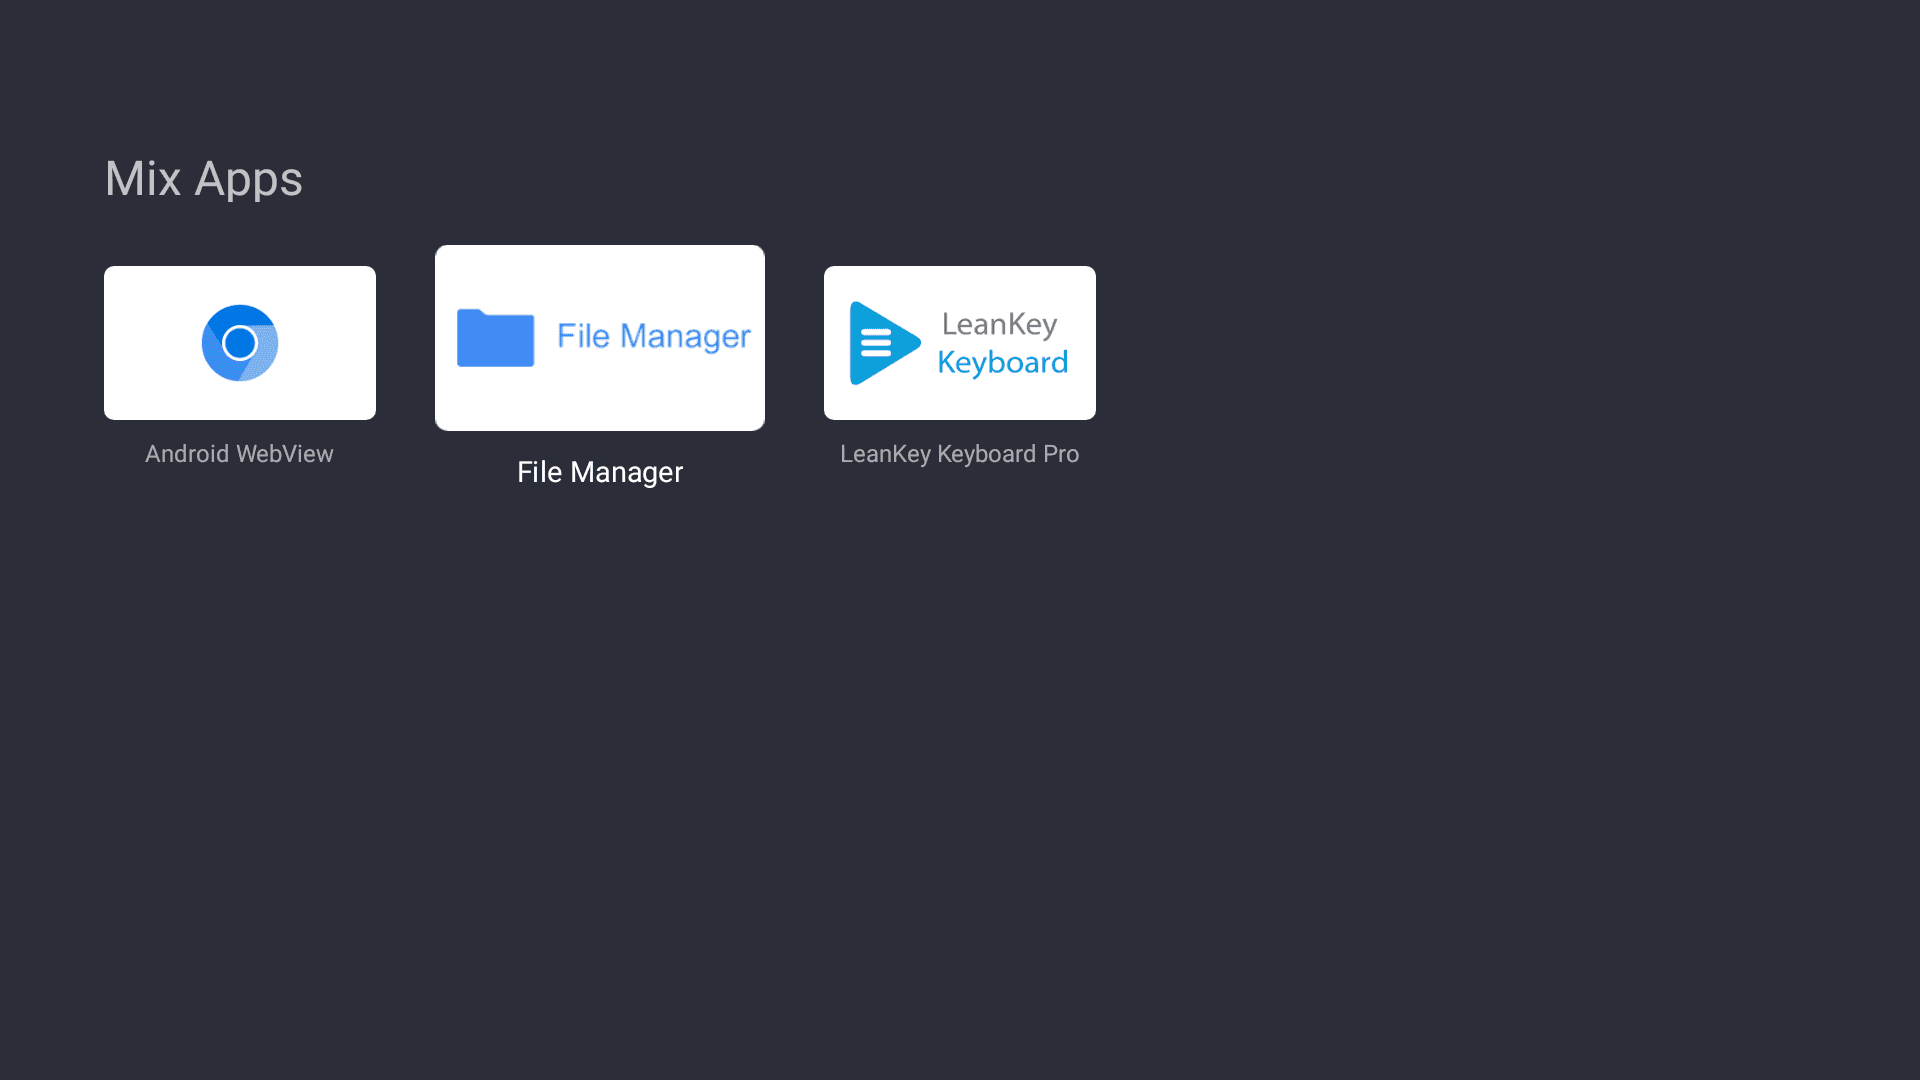
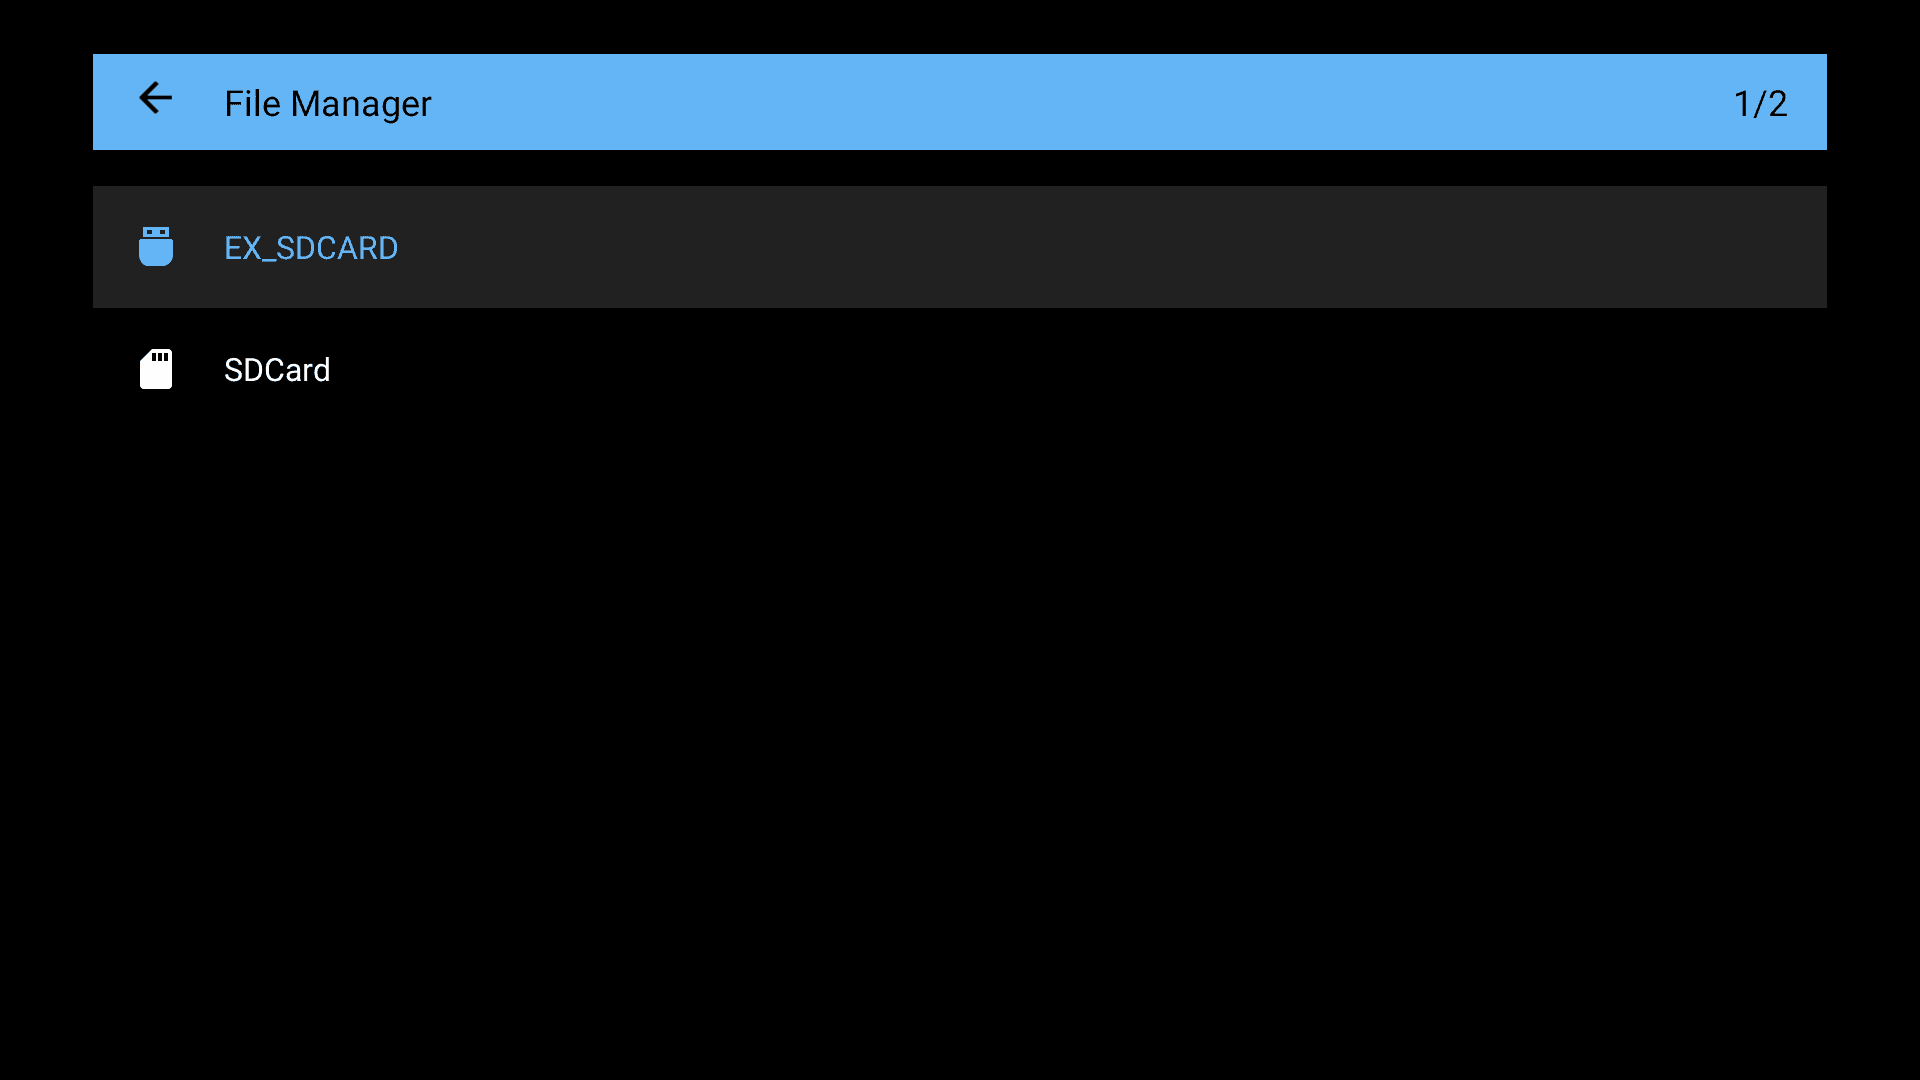
Open the File Manager app if you need to browse files manually or confirm file structure.
Return to the OpenConsole home screen.
Your games will appear automatically, organized by system, with cover art (which may take 5–10 seconds to load).
Use the controller to browse and launch any game by pressing the A button.
In-Game Menu (press Back + Start to access):
Save State – Save your current progress (up to 99 save slots).
Load State – Resume from a previously saved point.
Settings – Adjust scanlines, smoothing, FPS counter, etc.
Exit to Launcher – Return to the home screen.
If your games aren’t showing up:
Use the “Refresh ROMs” option in the settings menu.
Confirm that your files are in the correct folder structure (/roms/nes/, etc.).
Make sure the USB drive is formatted in a compatible format like FAT32 or exFAT.
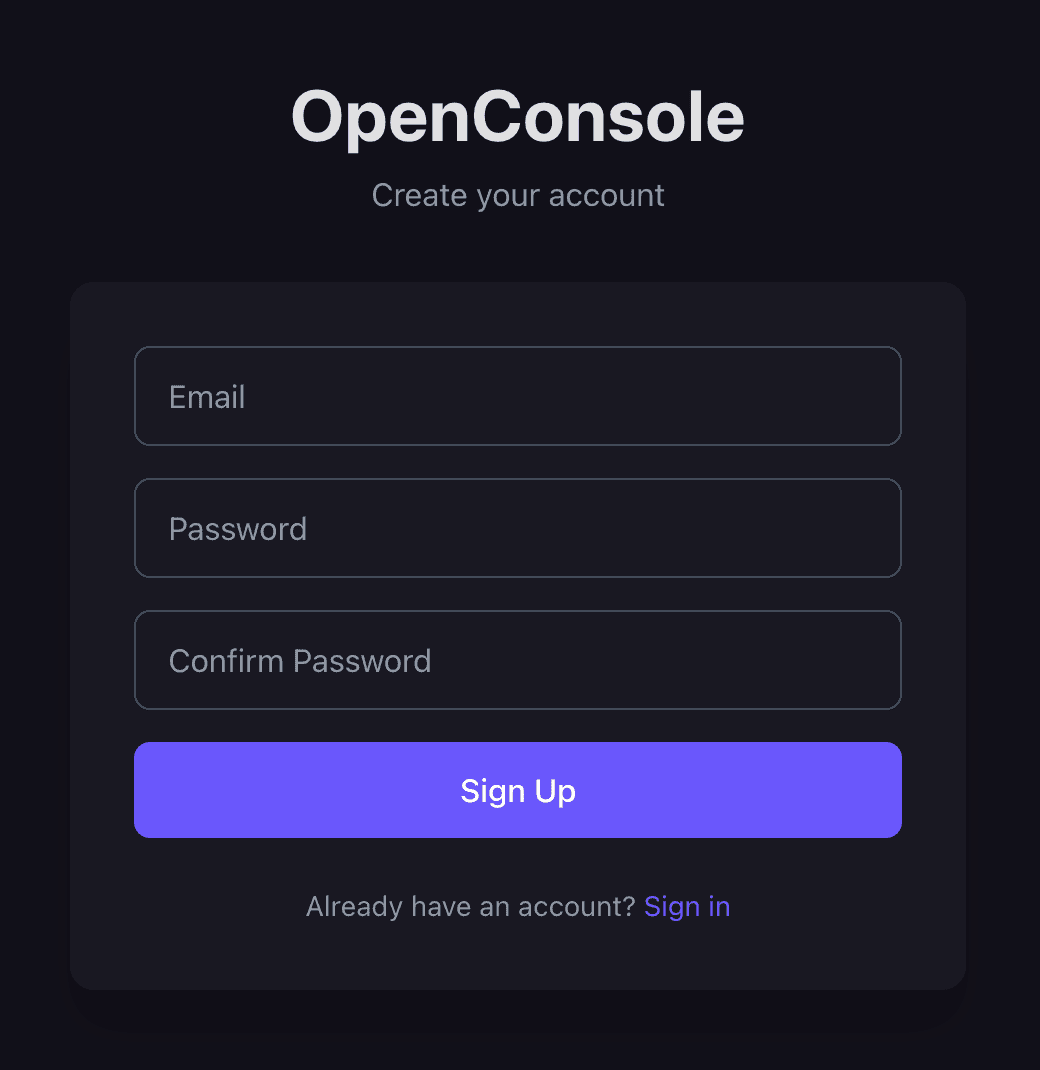
Create an Account (Optional)
You can start playing games right away without creating an account. However, signing in unlocks powerful features like game saves and cloud syncing.
How to Sign Up
Open the OpenConsole app
Click the account icon in the top right corner
Sign in using:
Email and password
Google
Discord

You can also create an account on https://app.openconsole.ai/signup
Benefits of Creating an Account
Save Progress: resume your games at any time, even after switching devices
Custom Game Library: add your own web games from app.openconsole.ai
Sync Across Devices: access your personal games and saves from any device
Cloud Backup: your data is safe during updates or if your device is lost
TV Login Support: use QR code and PIN for quick sign-in on TVs
Web Portal Tools: manage saves, download backups, and edit your game list
Private and Secure: only you can access your account and data
Creating an account is recommended for users who want to build a custom game library, sync progress across devices, and protect their data with cloud backup.
Troubleshooting
Controller Not Connecting
Ensure the controller is charged or try plugging it in with a USB cable.
Re-pair via Settings > Remotes & Accessories > Add Accessory.
If the controller connects briefly and disconnects, it may need to be fully re-paired after sleep mode.
Internet Connection Issues
Try connecting to a mobile hotspot. If successful, the issue is with your primary WiFi network.
Move the console closer to your router or try a different network.
If needed, connect via Ethernet using an OTG adapter.
Factory reset the device and reconfigure if persistent issues continue.
Games Not Loading or Crashing
Check that ROM files are valid and properly placed in the correct folders.
Restart the console and try again.
If web games are freezing or assets don’t load, try rebooting the device.
Use Refresh & Relaunch from the settings menu to reset the app environment.
Performing a Factory Reset
If your device is unresponsive or showing unusual behavior, a factory reset may help.
Soft Reset (From Home Screen)
Go to Settings > Device Preferences > About > Factory Reset.

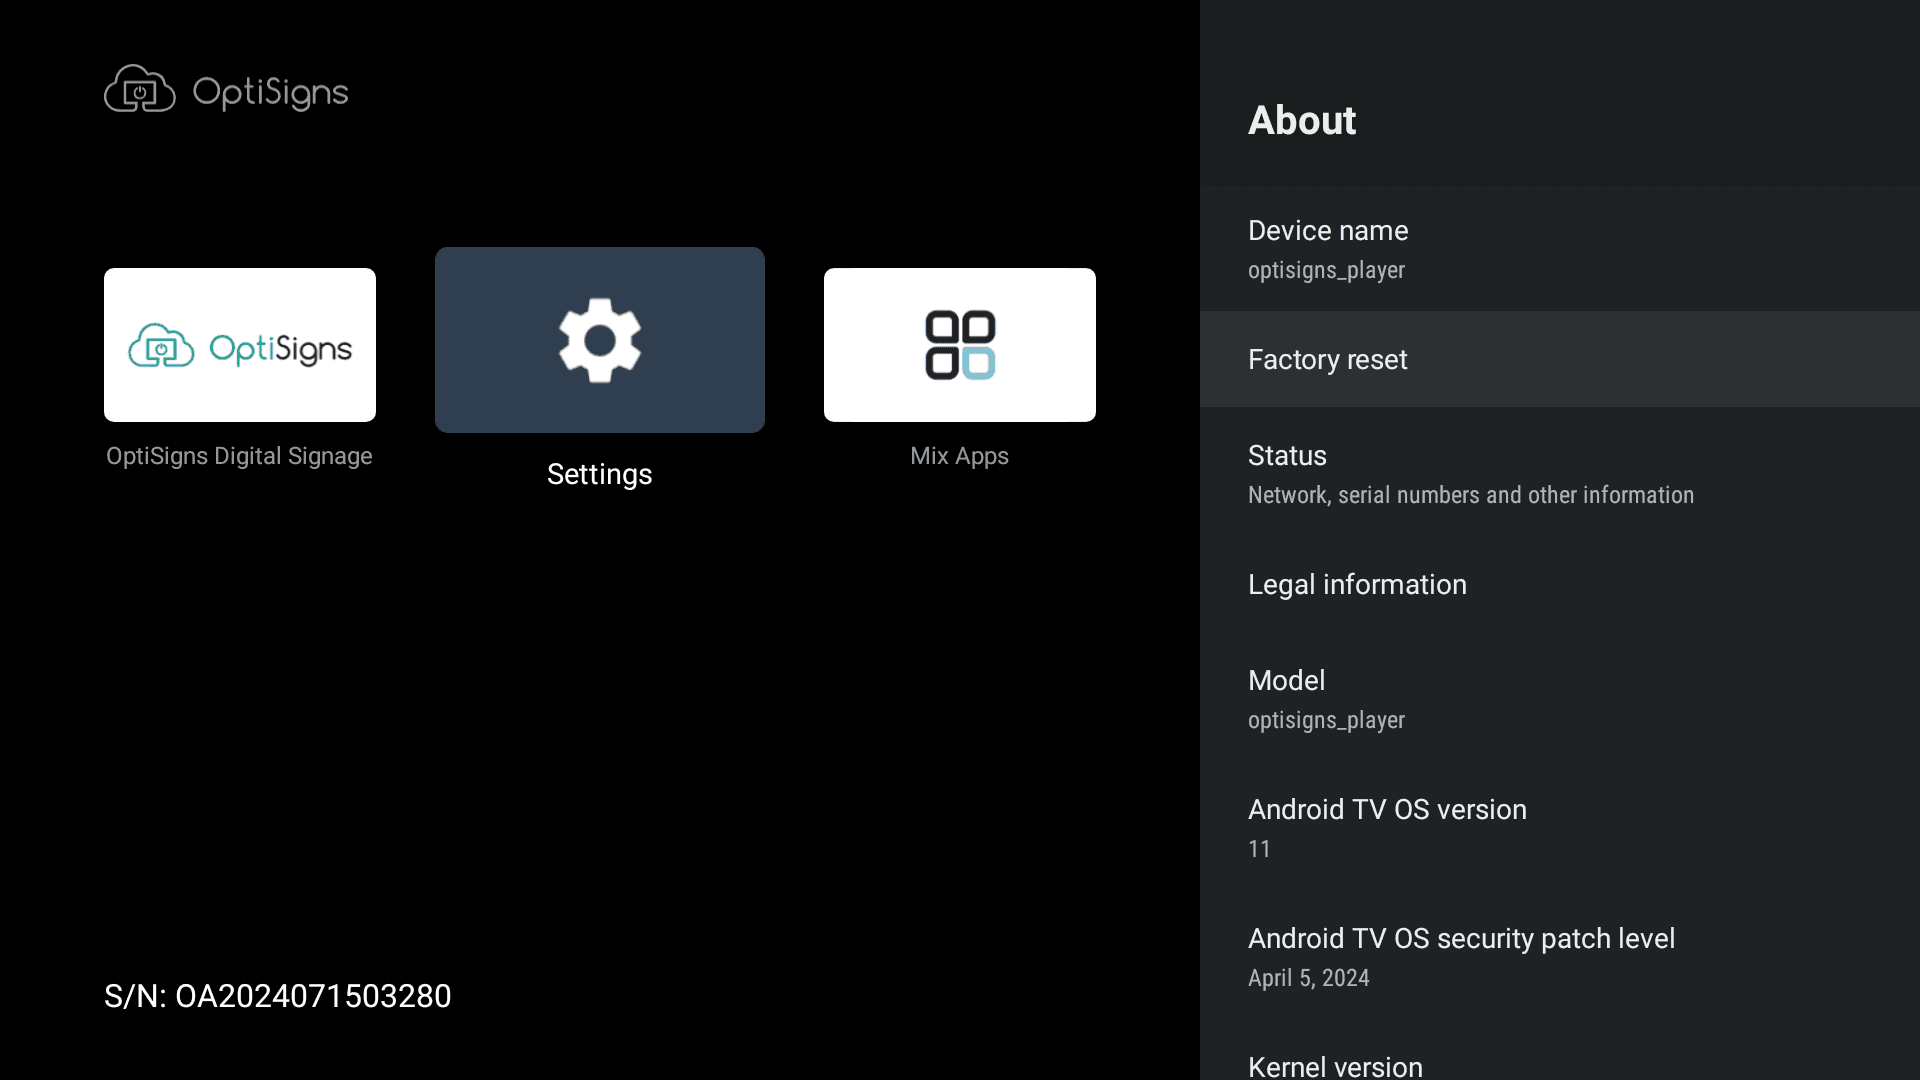
Confirm to erase all data and reset to factory defaults.
Hard Reset (Manual Reset)
If the system won’t boot:
Power off the device completely and unplug the power cable.
Use a paperclip or SIM tool to press the reset button inside the small pinhole on the side.
While pressing the reset button, plug the power cable back in.
Keep holding the reset button until the recovery menu appears.
Use the button to navigate and select Wipe data/factory reset.
When complete, select Reboot system now.
Safety & Compliance
For safety, recycling, and compliance information (including FCC, CE, RoHS), visit:
https://discover.optisigns.com/device-safety-info
Additional Support
Need help?
Email: support@optisigns.com
Phone: +1 (713) 589-8425
